Unity Developer guide
This guide should help you get up and running capturing your Unity-based experiences and rapidly getting them into VEO.
The guide consists of three parts:
- Getting the capture server running
- Describing the VeoBroadcastCamera script in the Unity package.
- Importing and setting up the script in your project.
If you've not done so already, we recommend you read the Unity tools introduction before continuing with this article.
Chat to us on Discord
Join our discord group for up to date information, help and support from our team and chat to other developers integrating with VEO.
Running the capture server
In order to capture video from our Unity builds, we need to have the capture server running on a windows machine in the same network as your Unity experience.
The Unity package uses UDP to locate the server on UDP port 49000 so as long as the server is running in the same network you shouldn't need to do any more than get it up and running and add your VEO credentials.
1. Download and install the latest version
Head over to the downloads page and grab the latest version of the server which comes in x64 and x86 MSI files and get them installed.
Install the MSI and run from the start menu. The application should be named VEO Video Capture Server.
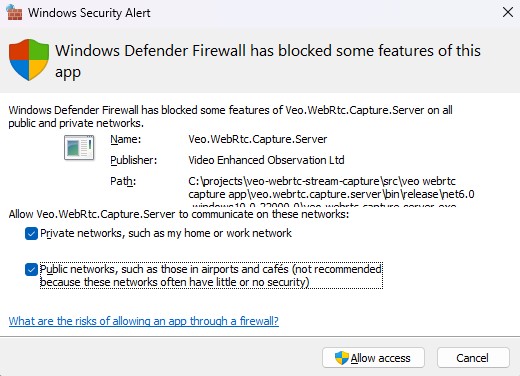
When you first run the application, you may be prompted with the network security warning.
2. Authenticate
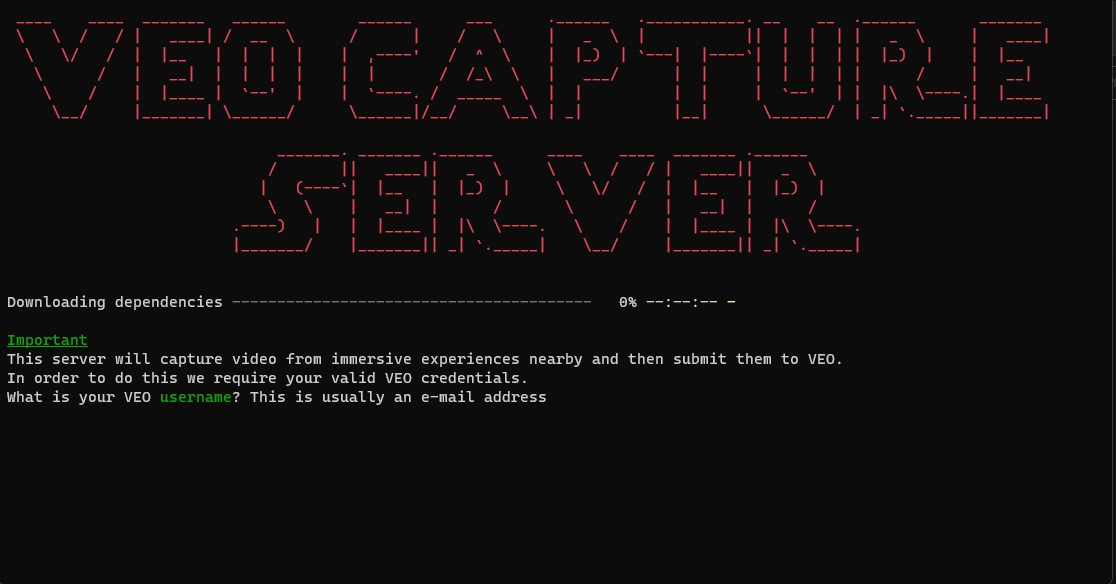
Once the application is running it will download additional tools it needs from the internet. These are the FFMpeg and FFProbe tools which are used to transcode the video after it has been received.
This download process should take no more than a few seconds after which you are prompted to enter your credentials.
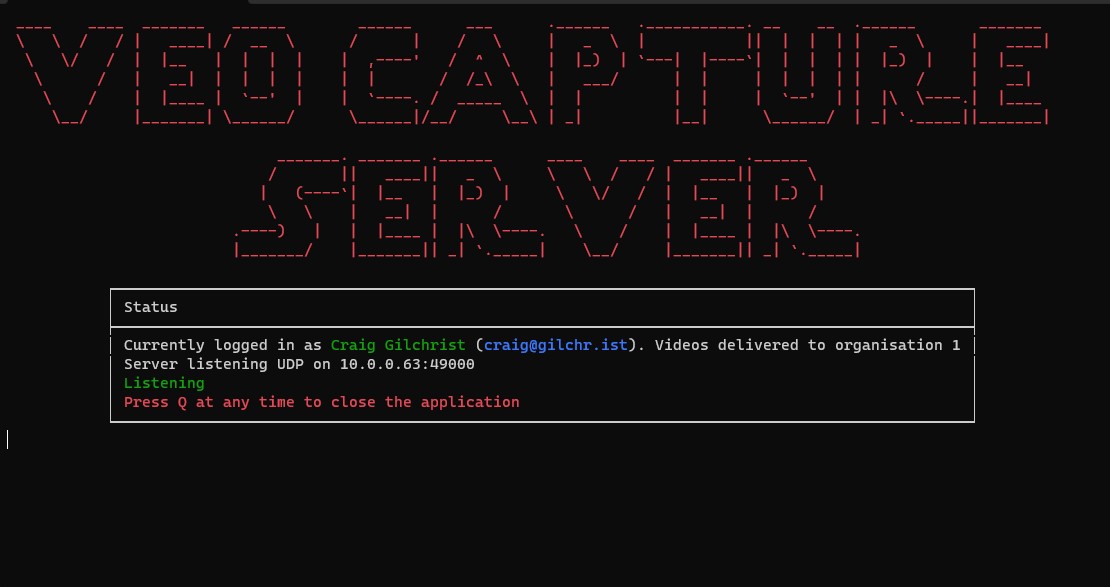
Once you've successfully entered credentials you'll see a login screen.
3. Start recording from your Unity applications
That's all you need to do and the Unity package should be able to find this server without any additional configuration.
The VeoBroadcastCamera Unity script
The VeoBroadcastCamera script is the only script you'll need in your Unity application to communicate with the capture server. We'll go through how to get it up and running in the next section. For now we'll delve into the properties and events.
Properties
Properties available to you as serialized fields allowing you to attach objects in Unity.
- Name
camera- Type
- UnityEngine.Camera
- Description
The camera object must be set. It's the camera which will be streamed to the capture server.
We recommend adding a second camera to the scene in your VR projects and attaching it to your XR controller if wishing to record first person. You don't need to do this but it gives extra control over what's being captured without affecting your user.
- Name
consumeCamera- Type
- bool
- Description
If set to true, then the VeoBroadcastCamera will entirely consume the camera and it won't render to screen. This allows even lower additional workload on your application (even though the load is small) but will render the camera inoperable.
You should only do this if you've created a camera that is dedicated to broadcasting to the capture server.
- Name
audioListener- Type
- UnityEngine.AudioListener
- Description
The audioListener object must be set. The audio listener track will form the audio track of your video. The operation is based on a loopback mechanism so doesn't add to the workload of your application at all.
- Name
videoBitrate- Type
- Range
- Description
The videoBitrate allows you more granular control over the maximum bitrate which is video sent to the capture server. We recommend using the default settings but this is available for you to customise.
- Name
audioBitrate- Type
- Range
- Description
The audioBitrate allows you more granular control over the maximum bitrate which is audio sent to the capture server. We recommend using the default settings but this is available for you to customise.
- Name
IsConnected- Type
- bool
- Description
A property allowing you to check in at any point to see if you are connected to a capture server.
Methods
- Name
Connect()- Type
- void
- Description
Call this function once you are ready to connect to the server.
This method does not start recording immediately, but sends the message to the server. The
RecordingStartedevent is raised to indicate recording has begun.
- Name
Disconnect()- Type
- void
- Description
Call this function once you want to completely disconnect from the server.
If you are recording then you should call the
StopRecording()method before disconnecting.
- Name
StartRecording()- Type
- void
- Description
Call this function to start recording. It will only be available after you have received the
ReadyToRecordevent.
- Name
StartRecording()- Type
- void
- Description
Call this function to stop recording. It will only be available after you have received the
RecordingStartedevent.
Events
The events give you an overview of when the package is ready to start recording, when it's finished it's recording and when the video has been sent to the VEO API.
The events allow you real granular control to integrate Veo into your experiences.
- Name
ReadyToRecord- Type
- void
- Description
Event which is raised when the connection is made and the IsConnected value has changed to true.
This will enable the
StartRecording()method.
- Name
Connected- Type
- void
- Description
Event which is raised when the connection has been established with the WebRTC server. At this point the connection isn't yet ready to start recording but it indicates that the ReadyToRecord event should be raised soon.
- Name
Disconnected- Type
- void
- Description
Event which is raised when the connection has been broken. In order to record again you need to call the
Connect()function.
- Name
ConnectionFailed- Type
- string
- Description
Event which is raised when a connection couldn't be established along with a message stating reason.
- Name
RecordingStarted- Type
- void
- Description
Event which is raised after the StartRecording method is called and when the server starts accepting the stream and recording it.
At this point you should call
StopRecording()before callingDisconnect()
- Name
RecordingStopped- Type
- void
- Description
Event which is raised after the
StopRecording()method is called and when the server starts its process of transcoding and uploading the video it to the VEO API for further AI and analysis.At this point you do not need to disconnect from the server however the server will not be available for recording again until the
ReadyToRecordevent is raised.
- Name
RecordingStopped- Type
- long
- Description
Event which is raised after a video has been uploaded to the VEO API and is available to you in the portal. The video ID is passed back to you as the argument.
Importing and setting up the packages in Unity
This guide will take you through the basic steps of setting up your project with the VeoBroadcastCamera script
1. Download the package
Create a new empty project in Unity.
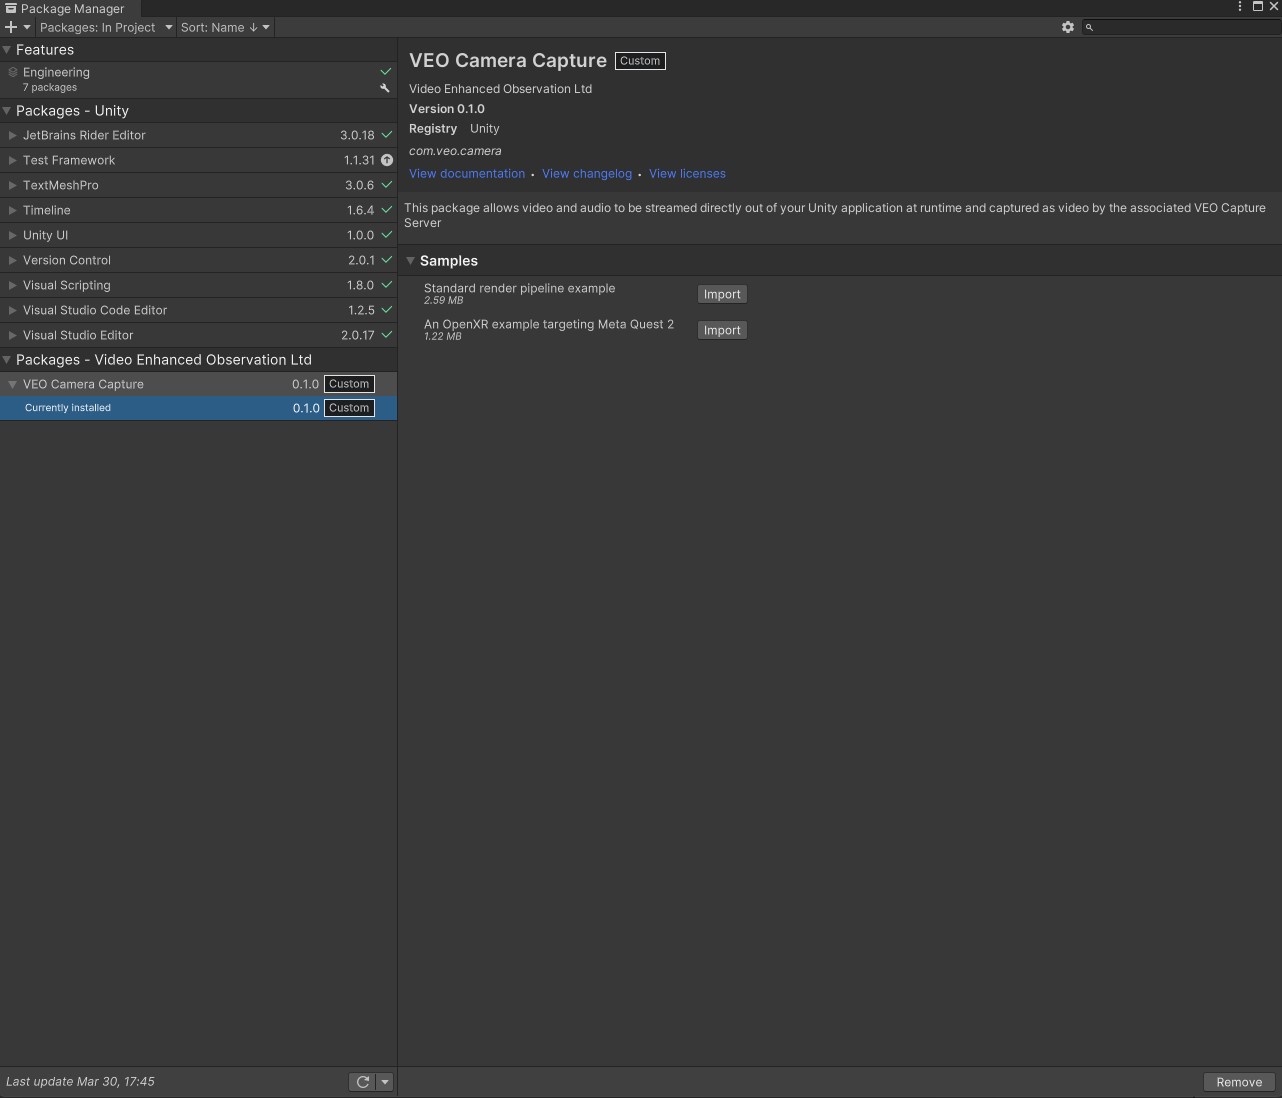
Grab the latest package from the downloads page and unzip it into the root of your packages folder of your project.
Open up the package manager in your Unity project and you should see the VEO Camera Capture package as seen here.
The package comes with two examples which are described in the samples page, for now we'll completely set up a new project from scratch.
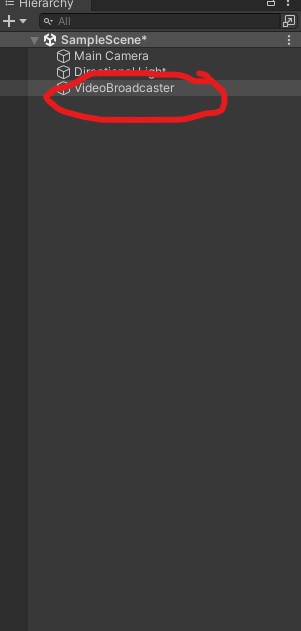
2. Add an object to your scene
Add a new object to your scene as a home for the VeoBroadcastCamera script. You can add this to an existing object like your camera but this gives extra control to turn off the game object entirely should you wish to.
3. Configure the camera script
Add the VeoBroadcastCamera script to your new object and set the following properties:
Camera- The camera you wish to stream. Use the Main Camera in our new scene.Consume Camera- Set this to false since we're just using the one camera in this demo.Audio Listener- The audio listener you wish to stream. Use the Main Camera in our new scene.
Leave the following properties with their default values:
Stream SizeVideo BitrateAudio Bitrate

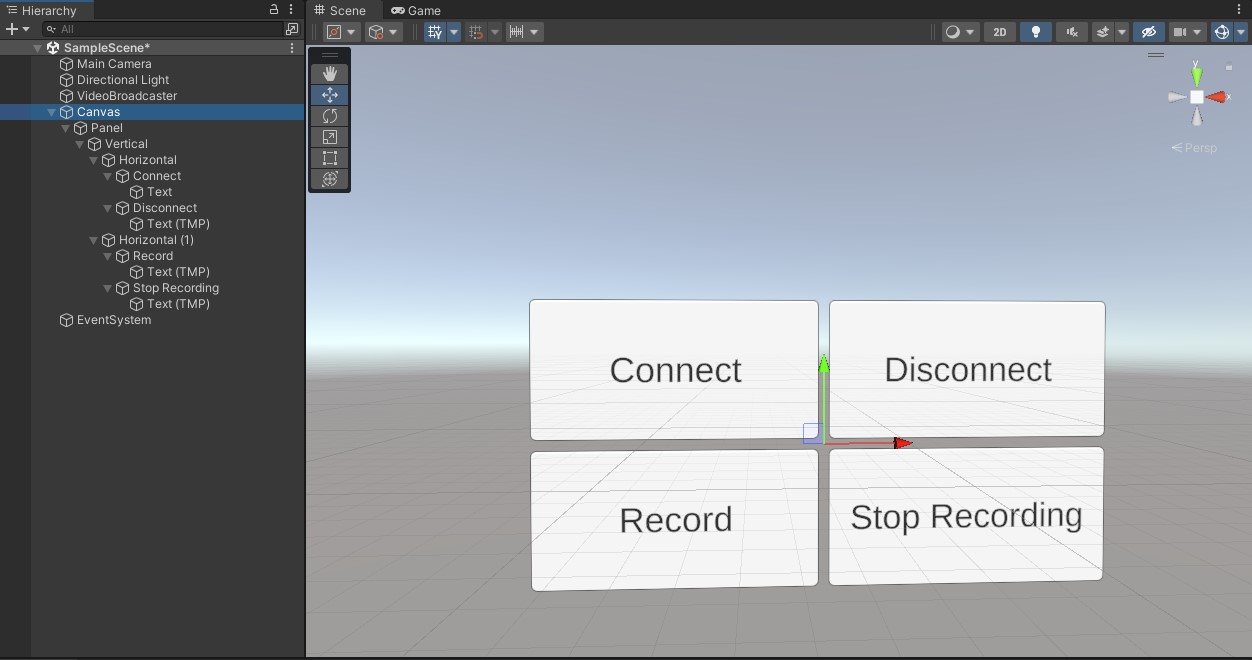
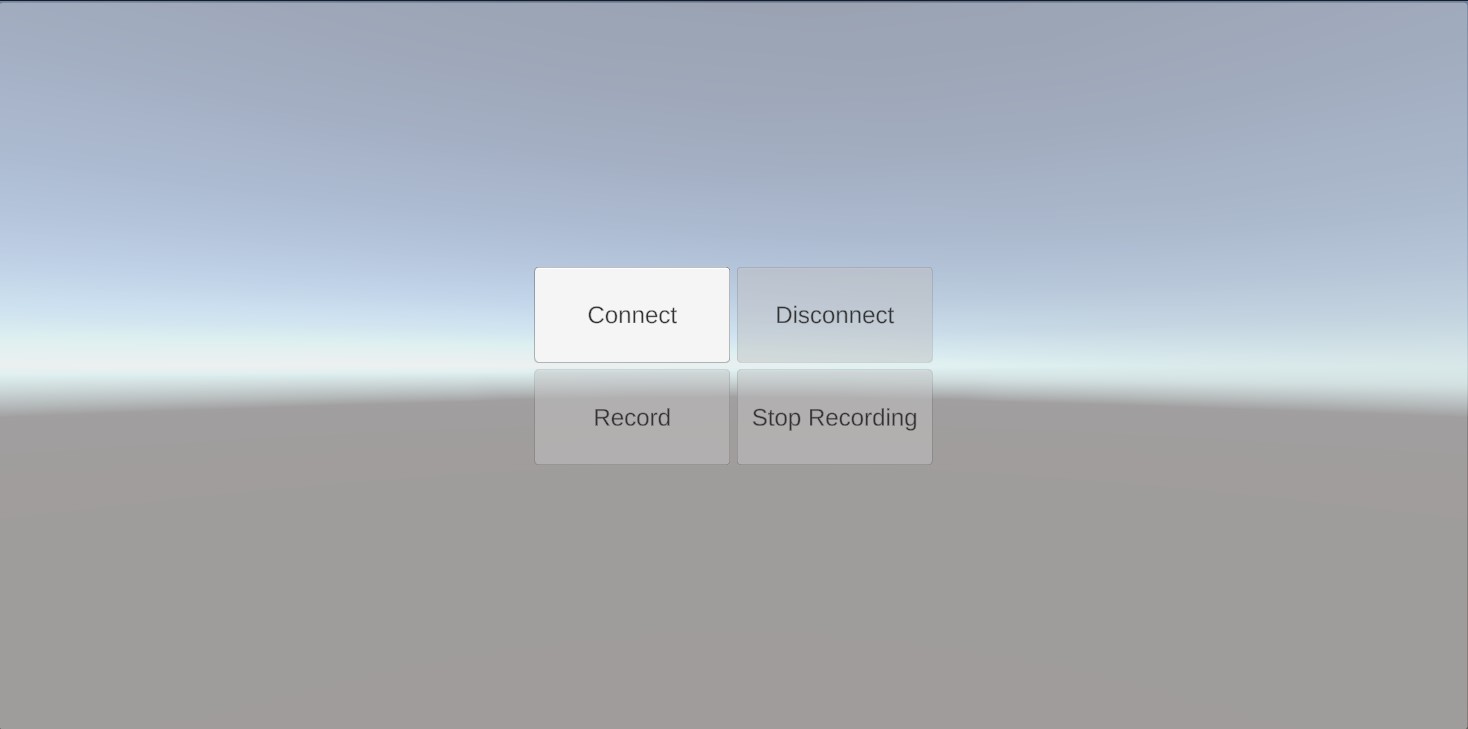
4. Create four buttons on the screen.
Add a new canvas and four buttons to control your camera. Don't worry too much about how they look.
5. Create a new script and attach it
Create a new script named RecordingController and attach it to the EventSystem.
Create five new fields to reference your buttons and the VeoBroadcastCamera instance and then attach them to the associated objects in your scene:
Add fields
[SerializeField] private Button connectButton;
[SerializeField] private Button disconnectButton;
[SerializeField] private Button recordButton;
[SerializeField] private Button stopButton;
[SerializeField] private Veo.Camera.VeoBroadcastCamera veoBroadcastCamera;

6. Disabling buttins.
Create a new method on your script to disable all the buttons as follows:
void DisableAllButtons()
{
    connectButton.interactable = false;
    disconnectButton.interactable = false;
    recordButton.interactable = false;
    stopButton.interactable = false;
}
Add the Awake function to the script where we will wire our button click handlers and also our VeoBroadcastCamera event handlers. To start with we'll just disable all the buttons and then make the connect button enabled again.
private void Awake()
{
    DisableAllButtons();
    connectButton.interactable = true;
}
7. Wiring the buttons up
Now we need to wire up our buttons. Our app will live in four states:
- Disconnected - here we should be able to call the
Connect()method of ourVeoBroadcastCameraand do nothing else. - Connected - While connected and not recording we should be allowed to disconnect or start recording.
- Recording - Here we should only be able to stop recording.
- Connected (post recording) - After we've finished recording and we've called
StopRecording()we shouldn't be able to callStartRecording()again until we've received theReadyToRecordevent again.
Let's start wiring our buttons up to that effect. We can wire the events later.
The Connect button
Now let's wire up our connect button. The button should disable all the buttons and call the Connect() method on the VeoBroadcastCamera.
Create a new method called ConnectClicked and call the DisableAllButtons() method and then the veoBroadcastCamera.Connect() method in the body.
Wiring the Connect button
// Add this to your Awake() function
connectButton.onClick.AddListener(ConnectClicked);
The Disconnect button
Now let's wire up our disconnect button. The button should disable all the buttons and call the Disconnect() method on the VeoBroadcastCamera.
Wiring the Disconnect button
// Add this to your Awake() function
disconnectButton.onClick.AddListener(DisconnectClicked);
The Record button
Now let's wire up our record button. The button should disable all the buttons and call the StartRecording() method on the VeoBroadcastCamera. It should also make the Stop button enabled.
Wiring the Record button
// Add this to your Awake() function
recordButton.onClick.AddListener(RecordClicked);
The Stop button
Now let's wire up our stop button. The button should disable all the buttons and call the StopRecording() method on the VeoBroadcastCamera. It should also make the Disconnect button enabled.
Wiring the stop button
// Add this to your Awake() function
stopButton.onClick.AddListener(StopClicked);
8. Wiring the events
Finally we need to wire up the events of the VeoBroadcastCamera to control our button state. Remember the following rules:
- When we receive the
Connectedevent we should be able to disconnect. - When we receive the
ReadyToRecordevent we should be able to callStartRecording() - When we receive the
Disconnectedevent we should be able to connect again.
With that in mind, add the following code to your Awake() function:
Wiring the VeoBroadcastCamera events
veoBroadcastCamera.Connected += (object sender, EventArgs e) =>
{
    DisableAllButtons();
    disconnectButton.interactable = true;
};

veoBroadcastCamera.Disconnected += (object sender, EventArgs e) =>
{
    DisableAllButtons();
    connectButton.interactable = true;
};

veoBroadcastCamera.ReadyToRecord += (object sender, EventArgs e) =>
{
    DisableAllButtons();
    recordButton.interactable= true;
    disconnectButton.interactable= true;
};
9. Test it!
That's it. All that's left to do is test your code.
I've included the full script here for brevity but you should be able to fire up the server application and run your code. It should go through the following states:
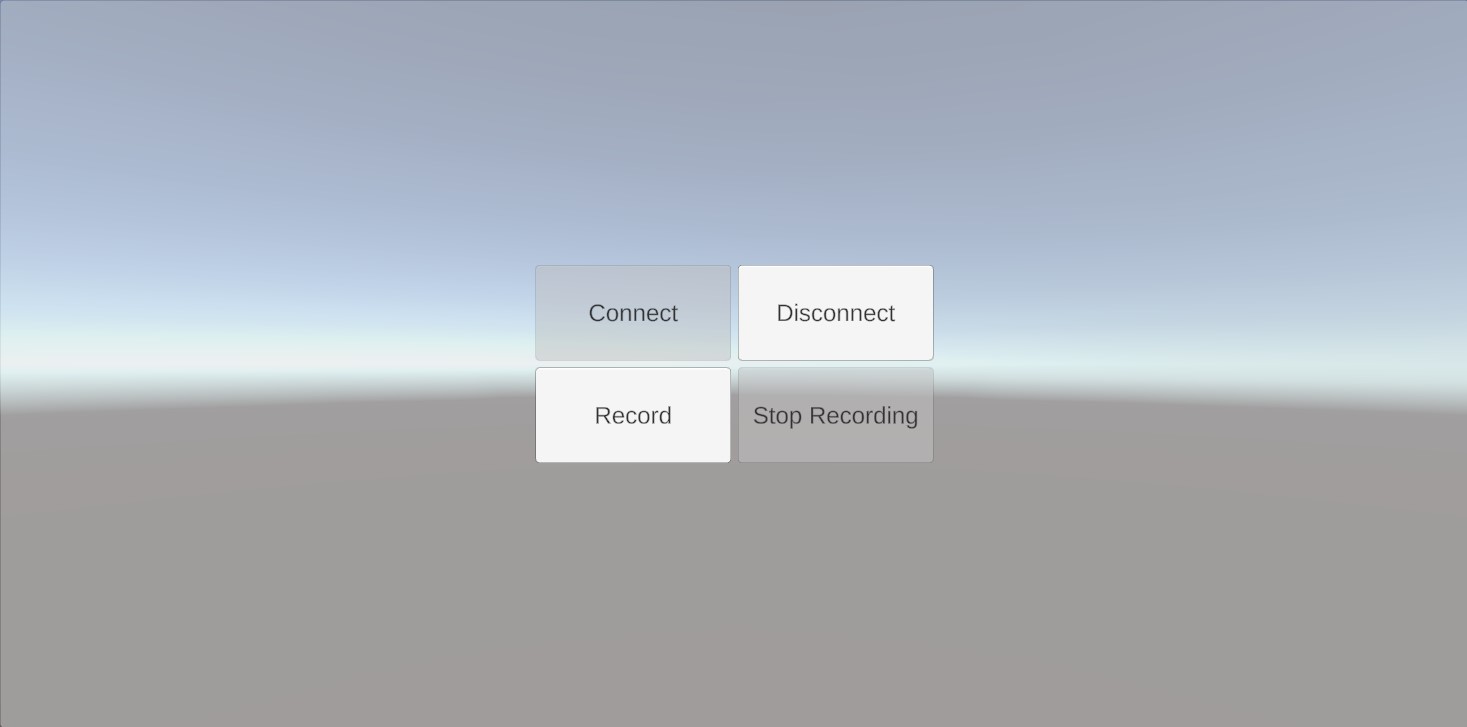
When it loads only the Connect button is available.
After you connect the VeoBroadcastCamera makes connection with the server and the ReadyToRecord event is raised and so the Disconnect and Record buttons become available.
When you hit record the stream starts being accepted by the server and only the Stop button is available.
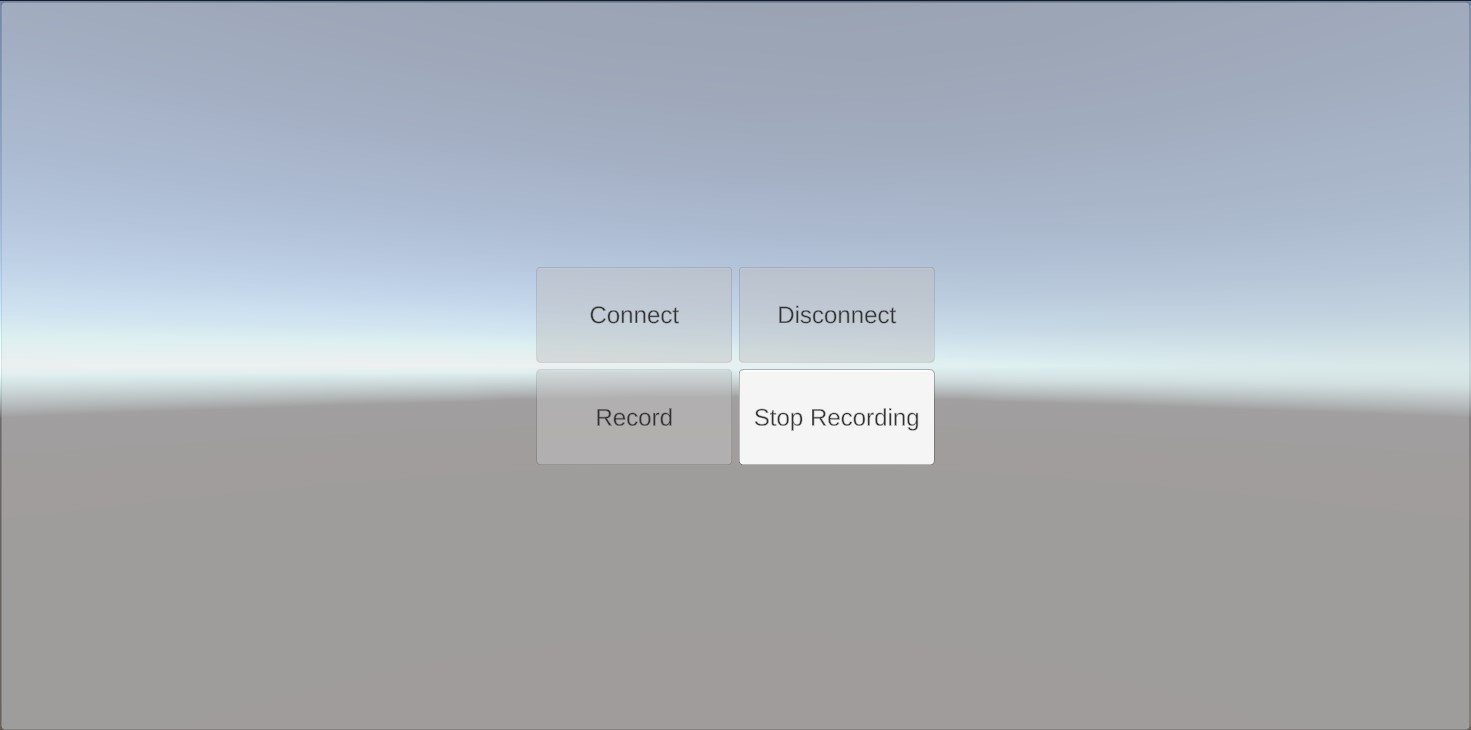
When you hit stop the message is sent to the server and only the disconnect button is available. The Record button will become available again when the ReadyToRecord event is received again.
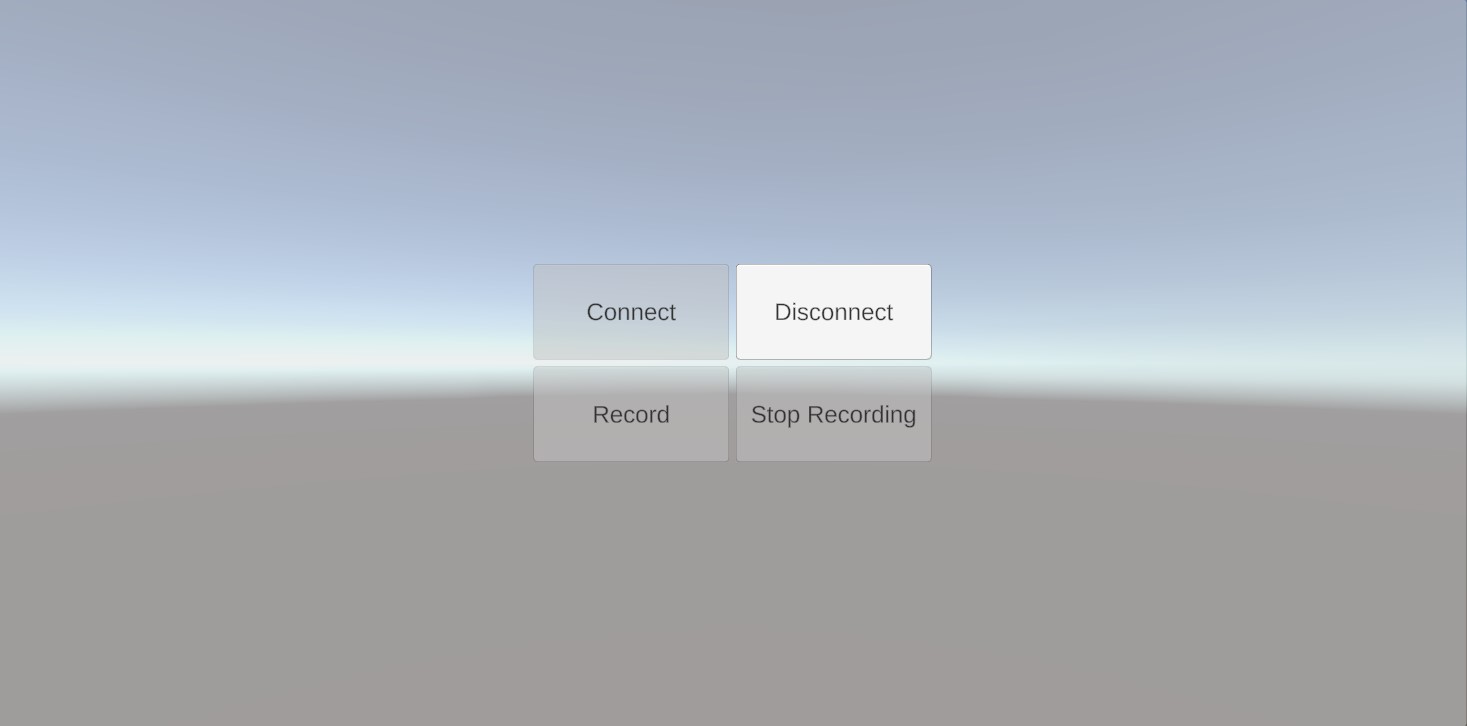
The ReadyToRecord event is received and so the Record button is interactable again.

Full code
using System;
using UnityEngine;
using UnityEngine.UI;

public class RecordingController : MonoBehaviour
{
    [SerializeField] private Button connectButton;
    [SerializeField] private Button disconnectButton;
    [SerializeField] private Button recordButton;
    [SerializeField] private Button stopButton;
    [SerializeField] private Veo.Camera.VeoBroadcastCamera veoBroadcastCamera;

    private void Awake()
    {
        connectButton.onClick.AddListener(ConnectClicked);
        disconnectButton.onClick.AddListener(DisconnectClicked);
        recordButton.onClick.AddListener(RecordClicked);
        stopButton.onClick.AddListener(StopClicked);

        DisableAllButtons();
        connectButton.interactable = true;

        veoBroadcastCamera.Connected += (object sender, EventArgs e) =>
        {
            DisableAllButtons();
            disconnectButton.interactable = true;
        };

        veoBroadcastCamera.Disconnected += (object sender, EventArgs e) =>
        {
            DisableAllButtons();
            connectButton.interactable = true;
        };

        veoBroadcastCamera.ReadyToRecord += (object sender, EventArgs e) =>
        {
            DisableAllButtons();
            recordButton.interactable= true;
            disconnectButton.interactable= true;
        };
    }

    private void ConnectClicked()
    {
        DisableAllButtons();
        veoBroadcastCamera.Connect();
    }

    private void RecordClicked()
    {
        DisableAllButtons();
        veoBroadcastCamera.StartRecording();
        stopButton.interactable= true;
    }

    private void DisconnectClicked()
    {
        DisableAllButtons();
        veoBroadcastCamera.Disconnect();
    }

    private void StopClicked()
    {
        DisableAllButtons();
        veoBroadcastCamera.StopRecording();
        disconnectButton.interactable = true;
    }

    void DisableAllButtons()
    {
        connectButton.interactable = false;
        disconnectButton.interactable = false;
        recordButton.interactable = false;
        stopButton.interactable = false;
    }
}
More samples
There are more samples available as part of the package. They are discussed here.